
I found great tutorial and I want to save on my blog.
Very good lesson, interesting and creative activity - Paint Glasses.

Source: instructables
Step 1 Clean Glass
This is the first step before you begin painting on your glass. You may wash your glass and then clean off with rubbing alcohol, or just clean off with the rubbing alcohol. Just try not to touch the areas to be painted once you have cleaned them.
Step 2 Select Your Paint
At this point you will need to pick the first two colors you will be using. In this case, I am using Cerelian Blue and Warm White.
Step 3 Load Your Brush

Please the two colors close to each other on your place or palette. Dip one corner of your flat brush in to one color the and opposite corner of your brush in to the other color. Begin to move the brush back and forth a few times and repeat this step. Your brush should be loaded at least 2/3rds of the way full. It is important to have plenty of paint on your brush. This will allow your brush to flow nicely creating a lovely painting.
Painting Flowers made easy by Ramesh Krish,Kerala
Step 4 Begin Painting Your Flower Petals
Start with the first petal that is at the top of your flower. Start on the chisel edge of your brush. Push and come around ending up on the chisel edge. Proceed in this same manner around the flower, until five petals have been painted. You may add more paint as needed. It is not necessary to move your paint brush back and forth on your palette or plate after adding more paint. When you begin your first stroke, do three blending strokes before creating the first petal. I would recommend this each time you add more paint and begin a new step.
Start with the first petal that is at the top of your flower. Start on the chisel edge of your brush. Push and come around ending up on the chisel edge. Proceed in this same manner around the flower, until five petals have been painted. You may add more paint as needed. It is not necessary to move your paint brush back and forth on your palette or plate after adding more paint. When you begin your first stroke, do three blending strokes before creating the first petal. I would recommend this each time you add more paint and begin a new step.
Step 5 Create Smaller Trailing Petals
Using the same paint colors, create smaller petals that will come off of the main flower. Then finish it with trailing flowers where you touch and pull the brush. Have these petal spray out and down from the main flower with a nice flow. You can do this on both sides of the main flower. You don't have to have both sides identical or starting at the same place on each side. Doing them differently addes more interest. Often you will find doing an odd number of petals and leaves is more pleasing to he eye.
Step 6 Paint Another Full Flower
Continue on around the glass and repeat the steps you did when you created the first full flower.
Step 7 Paint a Flowering Bud
This time you will do small petals in the similar fashion as the petals used in the flower, however they will be smaller and only two or three. After you paint the first row you are going to overlap with either two or three more small flower petels. At the base of this bud, you will be adding a small petal where you touch and pull starting from the top of the flower to the base. This will be painted on both sides of the flower.
Step 8 Cleaning Your Brush
Place your brush in your water basin and move it back and forth in the water. Once you have removed the previous paint, dry gently with a paper towel. You are now ready to move on to the next colors.
Step 9 Load Your Plate
You will now load your plate with the colors you have selected to paint the leaves. I have chosen Thicket (Green) and Sunflower (Yellow). These make a great combination for your leaves.
Step 10 Load Your Brush
The next step is to load your brush as you did earlier. Again remember it is important to have a lot of paint in your brush. Please make sure it is at least 2/3rds of the way full.
Step 11 Rippled Leaves
Start by placing two to three of the rippled leaves around each of the full flowers.
Step 12 One Stroke Leaves
Your next step will be to put a vine from the full flower to the bud. Then do a few quick short touch and pull strokes from the bud to the top of the vine. Then begin to add one stroke leaves in groups of at least three. Odd numbers work the best visually.
Step 13 Center of the Flowers
The next step is to complete the center of the flowers along with adding this to the smaller petals that are leading out from the full flowers. This does not include the trailing flowers that are touch and pull flowers. Load your plate or palette with School Bus Yellow. Stick the end of a smaller paint brush in to the paint. Place a dot in the center of the full flowers, along with the ends of the smaller petals leading from the full flowers.
Step 14 Create an Inky Green
Add some water, a little at a time to a small amount of the Thicket. Create an inky consistancy. Use your liner brush. Load it and then pull it from the paint up the ridge. This will pull some of the paint off and round out the brush.
Step 15 Curlycues
Use the inky Thicket paint to place curlycues in different places throughout the painted glass.
Step 16 Paint the Stem
If you would like to paint the stem, at this time load liner brush with Thicket Green. Paint a small line of green while turning the glass to swirl around the stem and end on the base.
Step 17 Paint Base
Start where the green line ends from the stem, paint five One Stroke Leaves.
Step 18 Cure
Allow the glass to air dry for 1 hour.
Step 19 Bake

Place the glass in the cold oven. Preheat the oven at 350 degrees.
Bake for 30 minutes. Add the preheat time on to the bake time. Allow the glass to cool completely before removing from the oven. If you choose not to bake your glass, the paint will cure within 21 days of air drying.
Step 20 Care
This glass is dishwasher safe if placed on the top rack. Do not let the glass soak in water. Handle with care as the paint could scratch.
You can see full tutorial step by step with photos [+ .PDF file] and many others interesting HERE
If you have any questions, please feel free to contact me at: aamilou@aol.com.
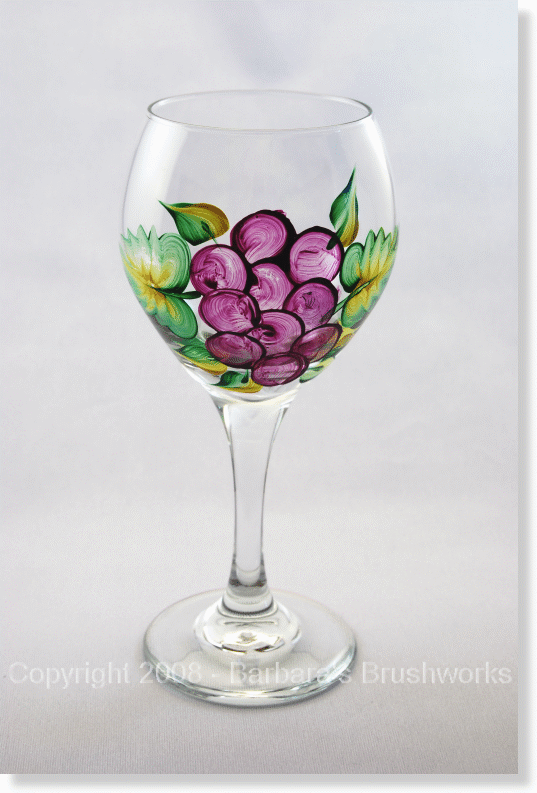 |
| Photo by Barbara's Brushworks |
Author: aressa
I am a decorative painter and the owner of The Painted House and More. I have over 16 years of painting experience. I am also a One Stroke Certified Instructor. I am currently looking for opportunity
Hand Painted home decor items painted by CanadianCreationz [few ideas]
Flowers Painting demo by Ramesh Krish Kerala

Nema komentara:
Objavi komentar
Thanks for comment...
Enjoy Life!